Zapier Set-up
How to Set Up WizCaller Triggers in Zapier for Twilio Calls and Messages
This tutorial provides a step-by-step guide on how to connect WizCaller to Zapier and set up triggers to receive detailed information on calls and messages through Twilio numbers. By the end of this tutorial, you’ll know how to configure triggers for new calls, completed calls, and new messages, allowing you to leverage WizCaller and Zapier for seamless communications.
Prerequisites
To follow this guide, ensure you have:
- An active WizCaller account with access to Twilio number settings.
- An active Zapier account.
- Authorization access to connect WizCaller to Zapier.
Step-by-Step Instructions
Step 1(a): Login in WizCaller and Set Up a Zap (Method 1)
1. Access Zapier Page: In your WizCaller console, begin by navigating to Settings > Zapier, to go to this URL: console.wizcaller.com/settings/zapier-integration.

2. Login to Zapier: Click on “Log in” or “Sign up” to log into (or create) an account on Zapier. In the pop-up window that appears, follow the instructions to login to your Zapier account.
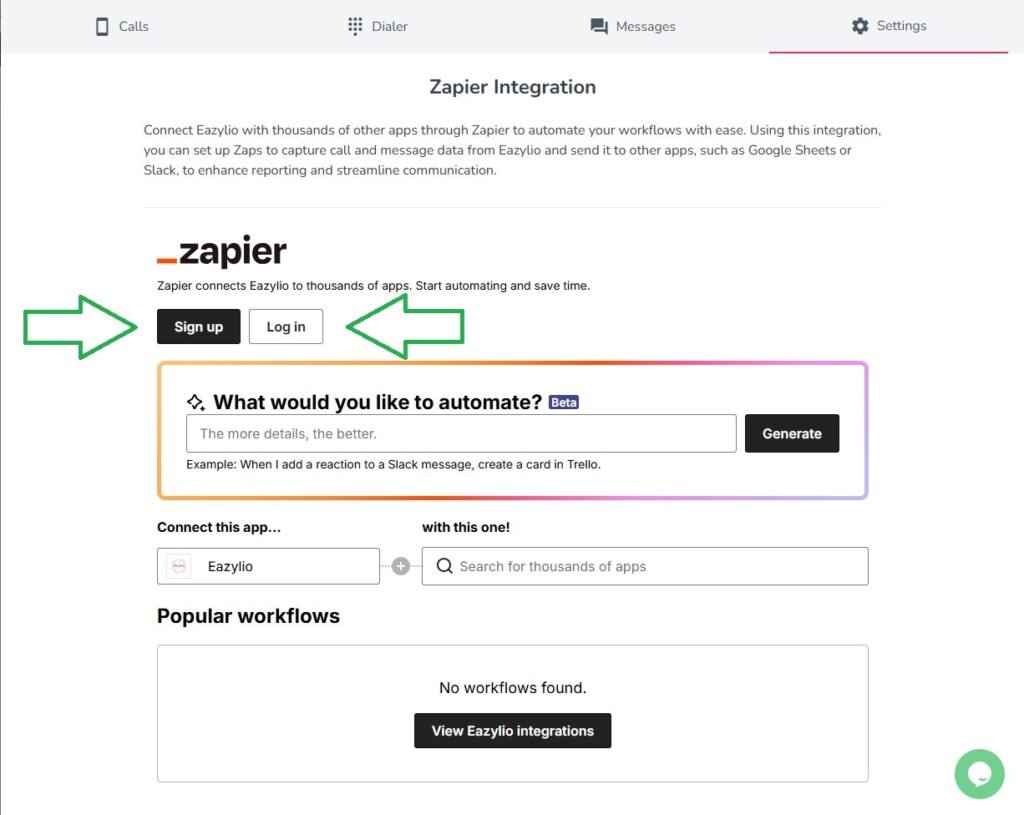
3. Create a Zap: Once logged in, click on “Create workflow” to start a new automation.

4. Skip to Step 3: If you followed this method to log in, then skip to Step 3 below.
Step 1(b): Login in Zapier and Set up a Zap (Method 2)
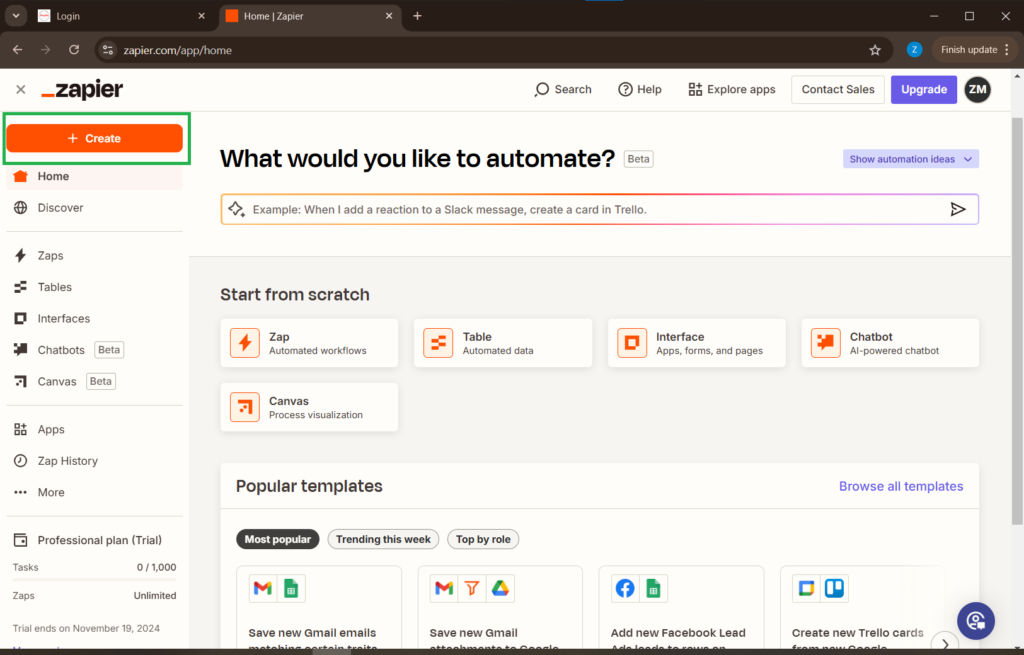
1. Log in to Zapier: Alternative to Step 1(a) above, you can create a zap by logging into zapier.com. Begin by logging into your Zapier account.
2. Create a Zap: Click on “Create” to set up a new automation.
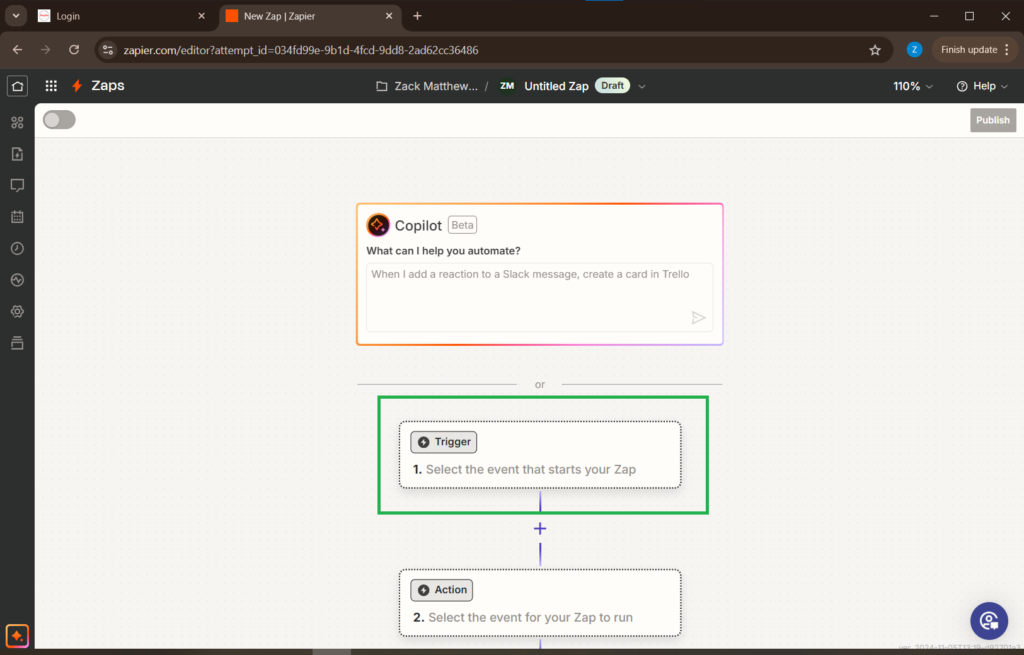
3. Add Trigger: Click on “Trigger” to open a dialogue box with Zapier’s app directory.
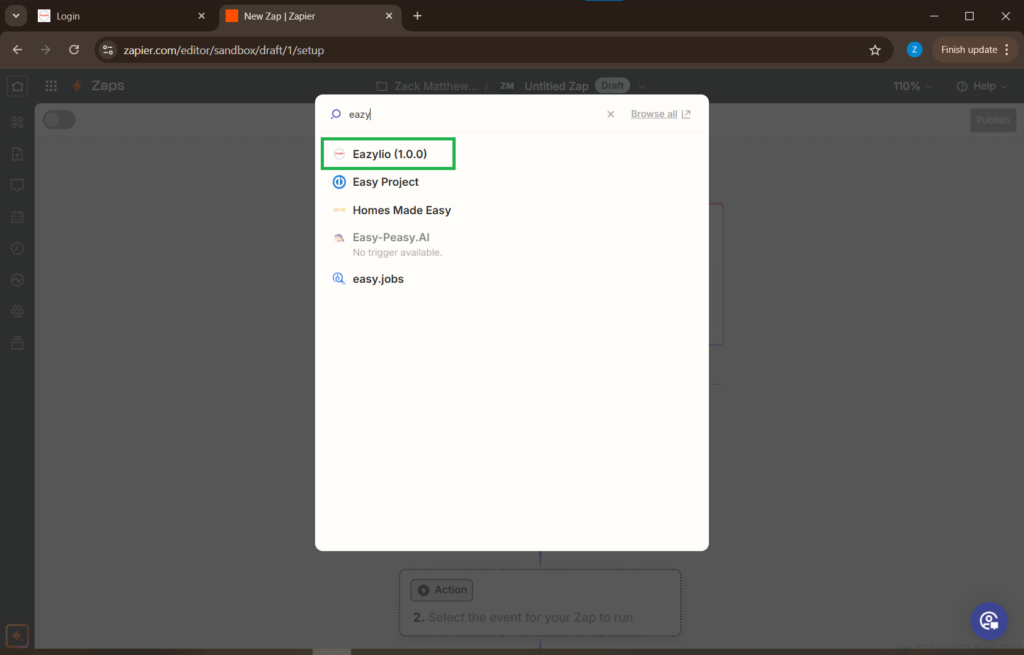
4. Search for WizCaller: In the app directory, type “WizCaller” to locate the app, and then click on it once it appears.
5. Select Trigger Event and Account: Once you click on “WizCaller”, you will now be able to select the trigger that you want to use, and link your WizCaller account (if this is your first time using the WizCaller app). See below for details.
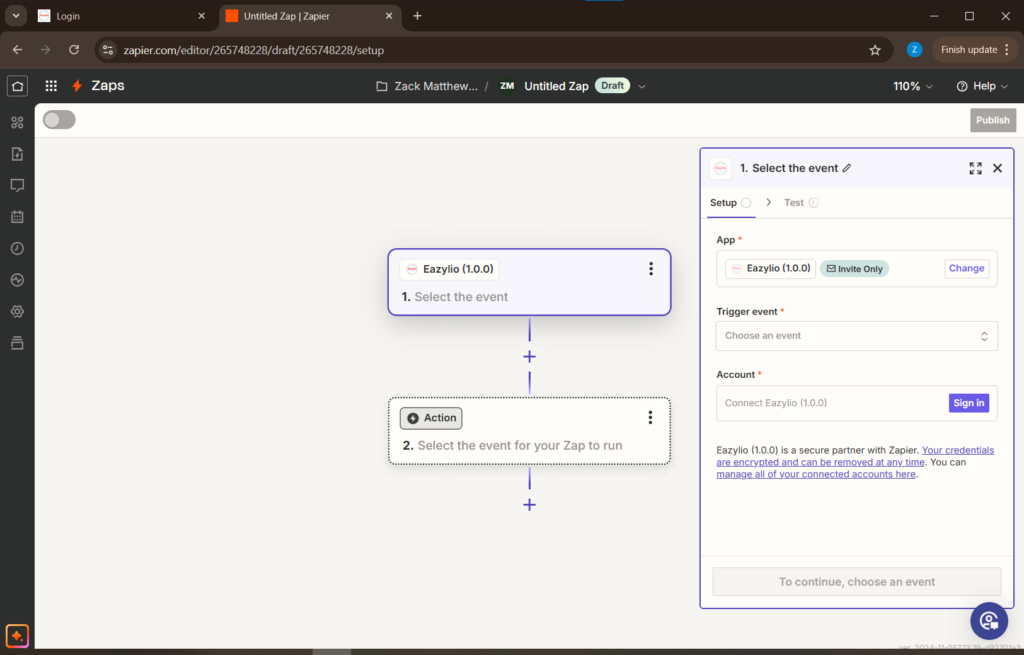
Step 2: Link Your WizCaller Account
1. Click on “Sign in”: If this is your first time using the WizCaller app, then you will need to link your WizCaller account to Zapier. To do so, click on “Sign in” in the Account text box.
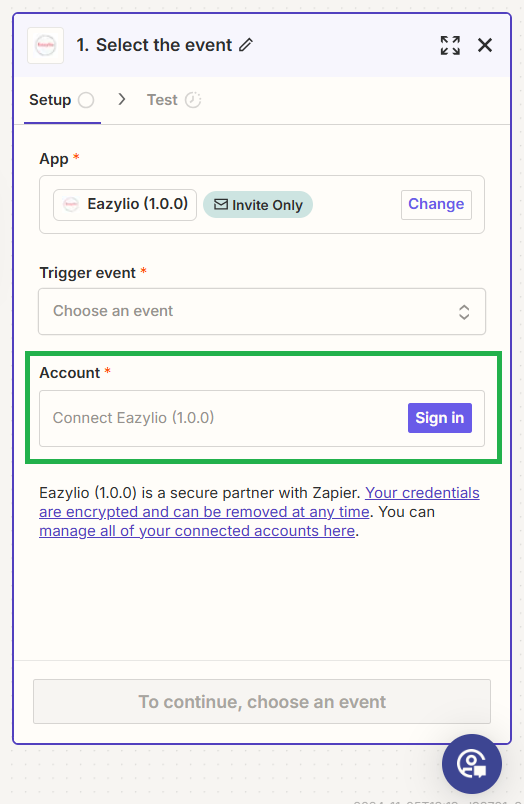
2. Log in to your WizCaller Account: A pop-up window will appear where you can enter your WizCaller credentials and log in.

3. Authorize Access: Once logged in, click Authorize to allow Zapier to connect with your WizCaller account, enabling it to access call and message details for automation.

Step 3: Select your WizCaller Trigger
1. Select a Trigger Event: Click on Trigger event, and choose the trigger that you want from WizCaller for your use case (a description of each trigger is written below).
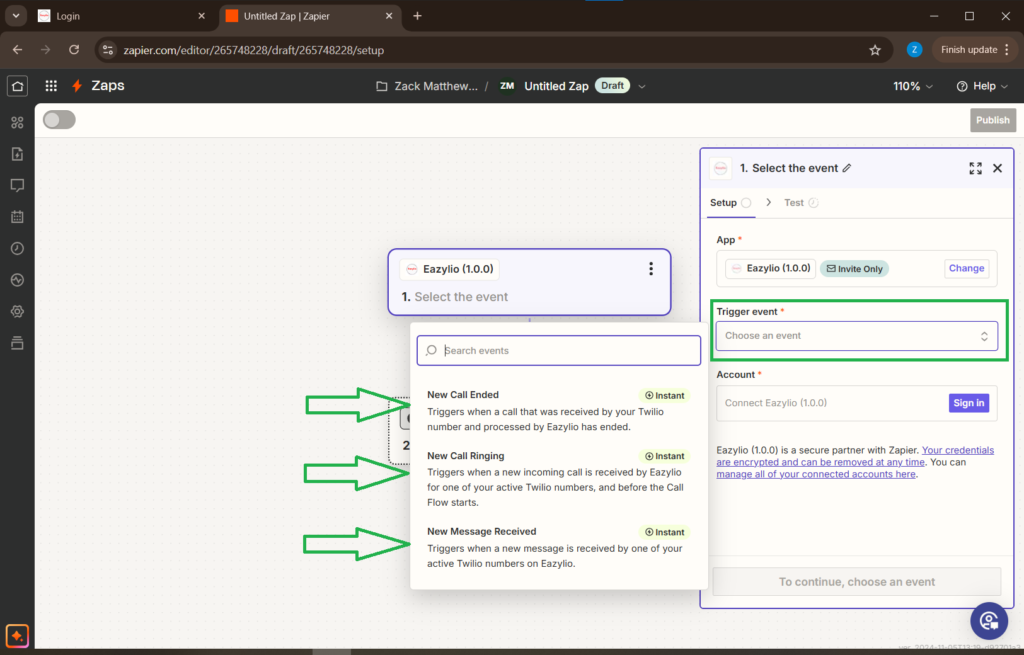
- New Call Ringing: This trigger activates as soon as a call lands in WizCaller but before the call flow processes it, allowing you to capture details as the call is received. Note that it does not contain a recording URL or call duration since the call is still in progress.
Information retrieved:
- From: The caller’s phone number (e.g., +15551231234)
- To: The Twilio number receiving the call (e.g., +15550980987)
- Twilio Number Name: The label assigned to the Twilio number in WizCaller
- Time: The timestamp when the call landed in WizCaller (e.g., 2023-08-01T06:50:30Z)
- Twilio Call SID: A unique identifier for the call (e.g., CAXXXXXXXXXXXXXXXXXXXXXXXXXXXXXXXX)
- New Call Ended: This trigger activates after a call has ended. It includes full details about the call, including the recording link and call duration, which become available only after the call is complete.
Information retrieved:
- Twilio Call SID: The unique identifier for the call
- From: Caller’s phone number
- To: Twilio number that received the call
- Received By: The number (or browser) that answered the call
- Twilio Number Name: The name assigned to the Twilio number
- Time: The time the call ended
- Call Duration: Total duration of the call (e.g., 1 minute 14 seconds)
- Recording Link: Direct link to access the call recording
- New Caller: Indicates if the caller is new to the system (Yes/No)
- New Message Received: This trigger activates whenever a new text message is received on a Twilio number, allowing you to log the message details.
Information retrieved:
- Twilio Message SID: Unique identifier for the message
- From: Sender’s phone number
- To: Twilio number that received the message
- Twilio Number Name: The Twilio number’s name
- Time: Timestamp when the message was received
- Message: Text content of the received message
4. Click Continue: Once you have chosen the trigger and linked your WizCaller account, click Continue to proceed.

Step 4: Configure the Trigger
1. Select Twilio Number: Click on Select Twilio Number(s) to open a drop down menu and choose from amongst the Twilio numbers you have in your WizCaller account.
- Note: You can choose more multiple Twilio numbers here, if you want the trigger to be in relation to all of them.

2. Add a Title: The User Reference Title is optional. It is a title of your choosing, to help you recognize which webhook belongs to which trigger later on in your WizCaller settings page (more details are mentioned below).

5. Test the Trigger: After you click on Continue, test the trigger. Zapier will retrieve sample data from WizCaller to confirm the connection and show a preview of the information available for each trigger event.

6. Confirm Sample Data: Select a retrieved record and check the retrieved sample data to see the details that you can use from this trigger.

Step 5: Set Up an Action in Another App (Example: Google Sheets)
Now that your WizCaller trigger is active, you can configure an action to log the data into another app. For this part, we will use Google Sheets as an example.
1. Choose Google Sheets as the Action App: In the Action step, search for Google Sheets.
2. Select Action Event: Choose Create Spreadsheet Row to automatically add new rows with the WizCaller data each time the trigger activates.
3. Connect Your Google Account: If you haven’t done so already, link your Google account by signing in and granting Zapier permission to access Google Sheets.
4. Choose Spreadsheet and Worksheet: Select the Google Sheet and specific worksheet where you want to log WizCaller call or message details.
Step 6: Map WizCaller Data to Google Sheets Columns
With your Google Sheets action configured, map the WizCaller fields to your Google Sheet columns. Here’s how to align the data for each trigger type:
- For New Call Ringing:
- From → Caller’s phone number
- To → Recipient’s Twilio number
- Twilio Number Name → Assigned name of the Twilio number
- Time → Timestamp of when the call landed
- Twilio Call SID → Unique call identifier
- For New Call Ended:
- From → Caller’s phone number
- To → Recipient’s Twilio number
- Twilio Number Name → Assigned name of the Twilio number
- Time → Timestamp of when the call ended
- Call Duration → Duration of the call
- Recording Link → Link to the call recording
- New Caller → Whether the caller is new to the system
- For New Message Received:
- From → Sender’s phone number
- To → Recipient’s Twilio number
- Twilio Number Name → Assigned name of the Twilio number
- Time → Timestamp of message receipt
- Message → Content of the message
- Run a Test: Test the action to confirm that WizCaller data correctly populates in the designated Google Sheets columns.
Step 5: Finalize and Activate Your Zap
1. Review the Zap Configuration: Double-check all trigger and action settings, ensuring data fields are correctly mapped and that the information flows as intended.
2. Activate the Zap: Once confirmed, activate the Zap by clicking on Publish.

Step 7: Managing and Adjusting Webhooks in WizCaller (Optional)
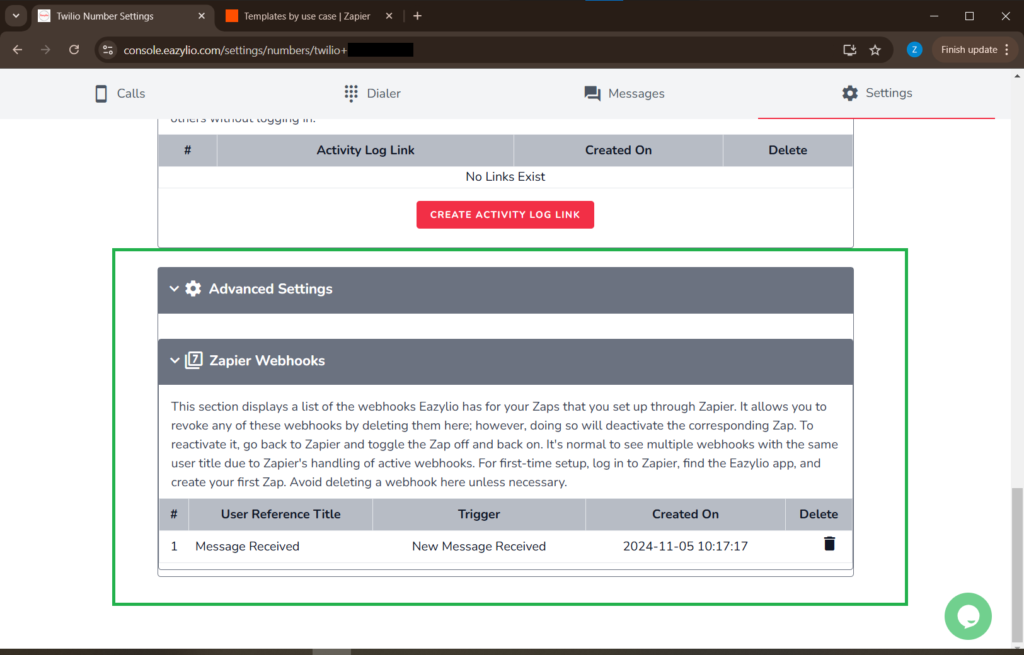
For additional control, WizCaller’s Advanced Settings in the Console allows you to view and manage Zapier webhooks:
1. In your WizCaller Console, navigate to Twilio Number Settings.
2. Scroll down to Advanced Settings, click on it, and then open the Zapier Webhooks section.
3. Here, you can review and delete existing webhooks (note that deletion is irreversible). If a webhook is deleted, turn the Zap off and on in Zapier to reactivate it.
Need Help with Zapier?
As part of WizCaller’s partnership with Zapier, their world-class support team is ready to assist you with any questions about the Zapier product, workflow setups, or the WizCaller integration.
If you encounter any issues with your integration or have questions about Zapier, simply direct your inquiry to the Zapier support page: Zapier Support.
This will give their team the necessary context to troubleshoot effectively and, if needed, provide a detailed report for us in the Bug & Feature Requests section of our app dashboard.
Common Issues and Troubleshooting
- Issue: Zapier cannot connect to WizCaller after attempting to authorize.
- Solution: Double-check your WizCaller credentials and make sure you are entering them correctly. Ensure you have permission to link third-party apps. If issues persist, try clearing your browser cache or switching to an incognito window before retrying.
- Issue: Triggers are not activating or missing data in Google Sheets.
- Solution: Verify that the Zap is correctly mapped by reviewing each field in the Map WizCaller Data to Google Sheets Columns section. Ensure each column has the appropriate data field selected, especially if using both the New Call Ringing and New Call Ended triggers (as each provides different details).
- Issue: The recording link and call duration are not appearing in the Google Sheets action.
- Solution: The New Call Ringing trigger activates before the call is processed, meaning the call duration and recording link will not be available yet. If you need these details, use the New Call Ended trigger instead, as it includes the full call information once the call is complete.
- Issue: Deleted webhooks in WizCaller aren’t reappearing in Zapier.
- Solution: Webhook deletions in WizCaller are permanent. To reestablish the connection, toggle the Zap Off and then On in Zapier. This process will send a new webhook to WizCaller, reactivating the link.
- Issue: Incomplete data being received from triggers.
- Solution: Check that all required permissions are set correctly in WizCaller. Verify that your account has access to detailed call/message data.
FAQs
- Why does the New Call Ringing trigger lack call duration and recording information?
- The New Call Ringing trigger is designed to activate as soon as a call lands in WizCaller, before the call flow is processed. As a result, it does not contain the call duration or recording link. For full call details, use the New Call Ended trigger.
- Can I retrieve previously deleted webhooks in WizCaller?
- No, webhook deletions in WizCaller are irreversible. However, if you need to reestablish a webhook, turn the Zap Off and then On in Zapier to create a new one.
- What should I do if my Zap is live but data is not being saved to Google Sheets?
- First, confirm that the Zap is indeed turned On. Next, check the Map WizCaller Data to Google Sheets Columns step to ensure each field is correctly assigned. Finally, test the Zap using recent data to verify that the Google Sheet is receiving the expected information.
- What happens if my WizCaller connection to Zapier expires?
- Re-authorize WizCaller in Zapier by following Step 1 of this guide.
- Can I customize the data fields in my triggers?
- The data provided is predefined by WizCaller, but you can customize actions and filters within Zapier based on the fields received.
